Flexible tabs in VueJS [Part 1]

Hello everyone. In this post I’m going to show you how to create a tabbed navigation in VueJS. Tabs are a very flexible and easy way to switch between content. Users are very accustomed with them because, well, they use them already. In their browsers! Working with a tabbed layout is even easier with Vue.

To speed things up and reduce the time spent styling the tabs we are going to use Bootstrap 4. At the time of this writing, Bootstrap 4 is still in alpha version but it’s very stable and brings in some powerful new features. So I’ve ditched Bootstrap 3 in favor of its newer edition. After adding Bootstrap 4 let’s create 3 simple tabs using the ‘nav-tabs’ Bootstrap class:

<div class="container-fluid">
    <div class="row">
        <div class="col-12">
            <ul class="nav nav-tabs">
                <li class="nav-item">
                    <a class="nav-link active" href="#">Tab 1</a>
                </li>
                <li class="nav-item">
                    <a class="nav-link" href="#">Tab 2</a>
                </li>
                <li class="nav-item">
                    <a class="nav-link" href="#">Tab 3</a>
                </li>
            </ul>
        </div>
    </div>
</div>

You can see the result we get is very satisfying, taking into account the amount of code we had to write to produce this.

tabblog1

Now that we’ve created the tabs we need a way to fill in their contents. The best tool for this job is a Bootstrap card

So let’s place the following code snippet right under our tabs:

<div class="card tab-contents">
    <div class="card-block">
        <div class="card-title">
            Tab Contents here
        </div>
    </div>
</div>

The result is almost perfect:tabblog2

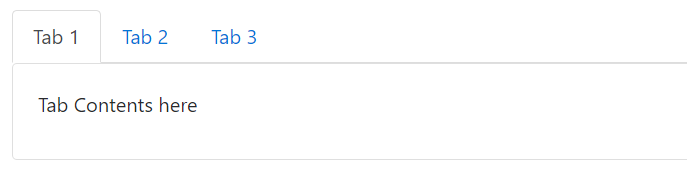
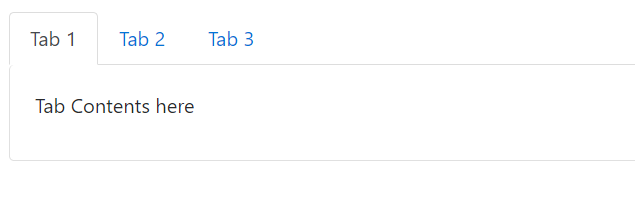
We need to remove this ugly line under the active tab so that our design can be a little bit more fluent and consistent.

.card.tab-contents {
    border-top: none;
}

Much better now:

tabblog3

Bootstrap gives us a stylistic starting point. But I think we have to improve our tabs to give them a more unique look and feel. To do that I changed some things in the HTML and I’ve added the following Sass styles and a font awesome icon on each tab that will serve as a ‘close button’. I’ve also made each tab a flex container, so that everything is aligned properly within it. A flex container will also be useful to us later when we will add a text box for renaming the tab

HTML:

<div class="container-fluid">
    <div class="row">
        <div class="col-12">
            <ul class="nav nav-tabs">
                <li class="nav-item">
                    <a class="nav-link d-flex align-items-center active tab" href="#">
                        <span>Tab 1</span>
                        <button class="icon-btn">
                            <i class="fa fa-times" aria-hidden="true"></i>
                        </button>
                    </a>
                </li>
                <li class="nav-item">
                    <a class="nav-link d-flex align-items-center tab" href="#">
                        <span>Tab 2</span>
                        <button class="icon-btn">
                            <i class="fa fa-times" aria-hidden="true"></i>    
                        </button>
                    </a>
                </li>
                <li class="nav-item">
                    <a class="nav-link d-flex align-items-center tab" href="#">
                        <span>Tab 3</span>
                        <button class="icon-btn">
                            <i class="fa fa-times" aria-hidden="true"></i>
                        </button>
                    </a>
                </li>
            </ul>
            <div class="card tab-contents">
                <div class="card-block">
                    <div class="card-title">
                        Tab Contents here
                    </div>
                </div>
            </div>
        </div>
    </div>
</div>

Sass:

$color-transition-duration: 0.8s;
$accent-color: #2980b9;
$x-hover-color: #c0392b;
$smaller-nav-item-padding: 8px;
$icon-size: 0.875rem;

ul.nav-tabs {
    margin-top: 12px;
}

.card.tab-contents {
    border-top: none;
    border-radius: 0;
} 

.nav-link.tab {
    border-radius: 0;
    
    //Override the 16px Bootstrap default to give it a more tab-like feel
    padding-right: $smaller-nav-item-padding;
    
    span {
        transition: color $color-transition-duration;    
        color: black;
        opacity: 0.54;
        &:hover {
            color: $accent-color;
        }
    }
    
    &.active {
        span {
            opacity: 1;
        }
    }
           
    .icon-btn {
        margin-left: 6px;
        text-decoration: none;    
        background-color: transparent;
        border: none;
        cursor: pointer;
        outline: none;
        font-size: $icon-size;

        .fa-times {
            opacity: 0.54;
            transition: color $color-transition-duration;
            
            &:hover {
                color: $x-hover-color;
            }
        }    
    }    
}

I’ve added some top margin, made the borders rectangular, grayed out the inactive tabs and added a nice transition. Nothing fancy, with enough room for further customization.

One last thing we are going to need is an additional button that will open up a new tab

<li class="nav-item">
    <a class="nav-link d-flex align-items-center tab add-btn" href="#">
        <button class="icon-btn">
            <i class="fa fa-plus" aria-hidden="true"></i>
        </button>
    </a>
</li>

And its styles:

.nav-link.tab {
	&.add-btn {
        padding-left: $smaller-nav-item-padding;        
        
        .icon-btn {
            color: $accent-color;
            margin: 0;    
        }
    }
}

Now that we’ve built the HTML/CSS part we need to move to the actual logic that will allow our tabs to work.

We will create a VueJS view model, add an array of objects where each objects represents a tab and we will dynamically load the tabs and their content on screen. We will also need an activeTab object to store the selected tab which by default will be the first one. All these requirements are expressed in the following view model:

JavaScript:

let app = new Vue({
	el: '#app',
    data: {
    	activeTab: null,
    	tabs: [
        	{
            	id: 1,
            	title: 'Tab 1',
                content: {
                	header: 'Tab 1 Header',
                    content: 'Tab 1 Content: Lorem ipsum dolor sit amet, consectetur adipiscing elit'
                }
            },
            {
            	id: 2,
            	title: 'Tab 2',
                content: {
                	header: 'Tab 2 Header',
                    content: 'Tab 2 Content: Praesent feugiat aliquam odio, at dictum nibh. Ut vitae quam nec nunc rhoncus sodales. In luctus venenatis auctor'
                }
            },
            {
            	id: 3,
            	title: 'Tab 3',
                content: {
                	header: 'Tab 3 Header',
                    content: 'Tab 3 Content:  Praesent consectetur luctus tortor vel feugiat. Vestibulum vitae tempor ipsum, quis pharetra augue. '
                }
            }
        ]
    },
    created: function() {
    	this.activeTab = this.tabs[0];
    }
})

Now that we can dynamically load our tabs, the view greatly simplifies:

HTML:

<div id="app" class="container-fluid" v-cloak>
    <div class="row">
        <div class="col-12">
            <ul class="nav nav-tabs">
                <li v-for="tab of tabs" class="nav-item">
                    <a v-bind:class="{'nav-link d-flex align-items-center tab': true, 'active': (tab.id == activeTab.id) }" href="#">
                        <span>{{tab.title}}</span>
                        <button class="icon-btn">
                            <i class="fa fa-times" aria-hidden="true"></i>
                        </button>
                    </a>
                </li>
                <li class="nav-item">
                    <a class="nav-link d-flex align-items-center tab add-btn" href="#">
                        <button class="icon-btn">
                            <i class="fa fa-plus" aria-hidden="true"></i>
                        </button>
                    </a>
                </li>
            </ul>
            <div class="card tab-contents">
                <div class="card-block">
                    <div class="card-title">
                        {{activeTab.content.header}}
                    </div>
                    <div class="card-text">
                        {{activeTab.content.content}}
                    </div>
                </div>
            </div>
        </div>
    </div>
</div>

As you can see we have a v-for loop that populates a template of an li with all the information about the tab. Check the created() method, which is a Vue lifecycle hook called immediately after the view model is initialized. There we make activeTab point, by default, to the first tab

Next, we want a way to cycle through tabs, select one and view its contents. So basically ,we need to change the activeTab whenever we click on a tab and Vue will take care of the rest. To do that we create an ‘activateTab’ in our methods object with just one line of code:

activateTab: function(tab) {
       this.activeTab = tab;
}

Now we only need to handle the event click in the view and pass the tab object to activateTab like this:

 v-on:click="activateTab(tab)"

So our list item template now looks like this:

<li v-for="tab of tabs" class="nav-item">
    <a v-bind:class="{'nav-link d-flex align-items-center tab': true, 'active': (tab.id == activeTab.id) }" href="#" v-on:click="activateTab(tab)">
        <span>{{tab.title}}</span>
        <button class="icon-btn">
            <i class="fa fa-times" aria-hidden="true"></i>
        </button>
    </a>
</li>

You can check the code from the first part of this tutorial in the following fiddle:

In the next part of this tutorial, I’m going to show you how to add, edit and delete tabs. Stay tuned!

Ridiculously simple form validation with Vue and VeeValidate

Today a friend of mine and fellow developer was asked during the technical part of a job interview to create a registration form along with both client-side and server-side validation having only a small time frame at his disposal and absolutely zero code. This event led me to write the post you are currently reading. This is a very common interview question for jobs regarding web development or Single Page Application development roles. I’ve been asked to write a form with validation in an interview too. In fact I have even asked candidates, from the other end of the table that time, to complete a registration form when tasked with coming up with an interview question for a role at a startup I used to work for.

Anyway, the point is that this is something that gets asked a lot and it’s good to be prepared. I’m going to leave server side validation for another blog post and concentrate on the client side of things. When the clock is ticking and the first traces of anxiety start to appear you need to be prepared. Ok, designing the form is not hard. You can grab your favorite framework like Bootstrap, Foundation, Material or whatever suits your taste.

The most time consuming part of the task is the validation process. So I sat down and tried to think of a validation library that produces the fastest results. I have used several JS validation libraries in the past like ValidateJS, Parsely and Aurelia Validation but, by far the most efficient and, in my opinion, the most architecturally correct is VeeValidate. VeeValidate is an open source Vue.js plugin. In case you’ve never heard about it, Vue.js is a reactive, progressive JavaScript framework that recently reached version 2. It’s being used and recommended a lot by the people at Laravel, so much that it can be mistaken as part of the framework itself.

It’s amazing how quickly you can get up to speed with VeeValidate. To begin with, there are, mainly, two ways you can get it in your project. The simplest one is to just include the script tag

<script src="https://cdn.jsdelivr.net/vee-validate/2.0.0-beta.25/vee-validate.min.js"></script>

You then have access to VeeValidate as a global object.

The other way to go is to install it with npm and import it as an ES6 module in your application. (Reminder: At the time of this writing, ES6/ES2015 modules are not globally supported by most browsers so you’re going to need a bundler like Webpack)

Whatever way you choose you then have to register the plugin with Vue. To do this add the following line:

Vue.plugin(VeeValidate);

UPDATE 09/2017
If you’re using the newest version of Vue you will have to include VeeValidate using Vue.use

Vue.use(VeeValidate);

All set. You can begin using it. (If you dig deeper into the documentation you will see that you can also pass in a config object but that’s not the purpose of this tutorial. We want results fast with minimal configuration and VeeValidate can provide them out of the box).

Now to the best part which is also the reason why I said before that VeeValidate is the most architecturally correct validation library I have used is that you can write your validation exclusively in the view. In your .html file. That reduces view model pollution and makes it more testable. That way you can quickly switch views if you want without having to clean your view-model. That’s not to say that you will never need to write code in your view model but for most cases, at least 90% percent of the validation code will reside in the view.

VeeValidate supports a variety of validation rules which you can apply in a way similar to Laravel’s validation for those of you familiar with it. The basics of working with rules are:

• Rules are placed in a v-validate custom html attribute inaide the input that needs validation
• Rules are separated with a pipe (‘|’) just like in Laravel
• The input that you want to validate must have a name attribute.
• You can access the error messages by using the “errors” variable in the view
• You can check if a specific field is valid by checking if errors.has(““)
• You can access the first error message for a specific input with errors.first(““)
• You can access all error messages for a field using errors.all(““)

That’s essentially what you need to know to work with VeeValidate. Let’s skip the introduction and look at the code. Let’s say that you want to validate a password field. You want a password to always be present, so your password field is “required”. You also want it to be at least 8 characters long but no more than 32 characters. You can achieve it like this:

<input name="password" type="password" placeholder="Choose your password" v-validate="required|min:8|max:32">

To show an error message when the validation fails:

<span v-if="errors.has('password')">{{errors.first('password')}}</span>

Now that you know what VeeValidate is and how it works let’s move on to the form creation. I’m going to be using Bootstrap 4. You can swap the CSS classes with your own:

So as you can see the view model remains as clean as possible. All the validation takes part in the view and that’s what makes the library so awesome. Now if you want to provide custom error messages you will need to write some JavaScript code too but it does not have to be inside the view model. For more information check the official documentation http://vee-validate.logaretm.com/rules.html#custom-messages

It took me 34 minutes to create this form from scratch. I could have gone so far as to trying to achieve the same result using the validation libraries I mentioned above but that would make the post enormous and hard to write as well as read so I guess you’ll have to take my word for it.